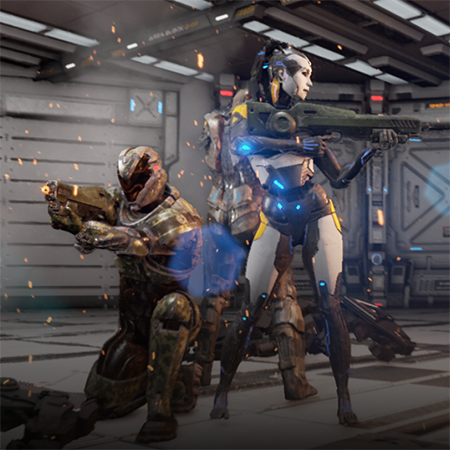
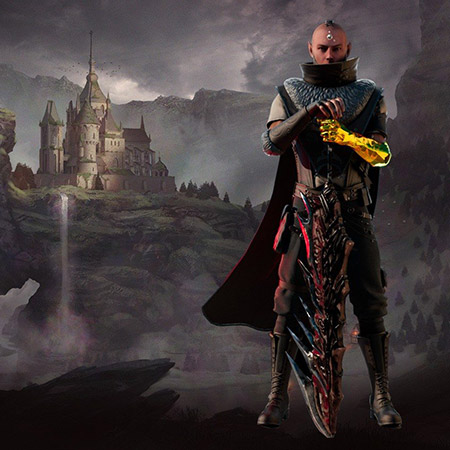
Creating cinematic visuals in Unreal Engine 5.6 requires more than selecting the right assets. You need a clear understanding of how the engine handles lighting, materials, post-processing, and camera setups. Many teams invest a significant amount of time in trial and error before achieving film-quality results. However, proven methods and expert workflows can shorten this path.
In this guide, you will find specific tips used by professionals who build top-tier visuals in games, cinematics, and marketing assets. Whether you develop cutscenes, trailers, or immersive gameplay moments, you will learn techniques that work in real production environments.
An Unreal Engine game development company often deals with strict deadlines, client expectations, and platform constraints. The following advice reflects that reality. You will not find broad statements here, only precise recommendations that you can apply to your project today.
Expect clear breakdowns of lighting setups, camera tricks, rendering settings, and post-processing stacks. The focus will stay on what delivers noticeable results without wasting production time. Start applying these techniques to upgrade your visuals with practical steps that industry pros already trust.
Why Cinematic Quality in UE 5.6 Drives Production Value
Producing visuals that look cinematic raises both the appeal and the perceived value of any interactive experience. Audiences now expect scenes with depth, precision, and dynamic lighting. In Unreal Engine game development, achieving this no longer requires film-industry pipelines. UE 5.6 delivers tools that support both speed and visual fidelity.
Cinematic quality also drives marketing assets, trailers, and in-game cutscenes. When done right, it helps studios stand out in a saturated market. The following sections explain how to take full advantage of UE 5.6 for such results.
Why Use Unreal Engine 5.6 for Film-Quality Visuals?
UE 5.6 offers real-time capabilities combined with cinematic-grade control. You can output scenes with near film-level depth without complex offline workflows. The following benefits explain why more teams are adopting it:
- Real-time feedback. Artists see changes instantly, improving iteration speed and creative control.
- High-fidelity lighting. Lumen supports dynamic global illumination and reflections with minimal setup.
- Advanced post-processing. Built-in color grading, exposure, and camera effects save time compared to external tools.
- Filmic camera controls. Focal length, aperture, and lens effects mimic real-world cinematography accurately.
- Versatile export options. You can output for games, cinematics, or marketing without switching platforms.
For studios seeking efficient, high-quality visual output, UE 5.6 provides unmatched flexibility and control.
What’s New for Cinematics in UE 5.6?
Unreal Engine 5.6 brings major upgrades for teams focused on cinematic work. Many of the latest tools improve control, speed, and quality.
- Cinematic Assembly Toolset. Streamlines shot management with reusable templates and tighter pipeline integration.
- Sequencer updates. New navigation tools, relative audio scaling, and improved real-time audio scrubbing simplify timeline management.
- Quick Render. Enables fast rendering of stills or sequences from selected cameras with one click.
- Mocap Manager. A full in-editor system for managing performance capture, from setup to asset organization.
- Enhanced Live Link integration. Improved facial performance capture workflows with Capture Manager and Live Link Hub.
- MetaHuman improvements. In-editor MetaHuman creation and animation tools now allow full-body customization and real-time facial capture.
- Motion Trails and Tween tools. Improved animation authoring in-editor with enhanced motion visualization and precision keyframe control.
All these features give content creators faster, more integrated ways to deliver high-end cinematic content directly in-engine.
UE 5.6 vs. Offline Renderers — When Real-Time Cinematic UE 5.6 Makes Sense
Offline renderers still serve specific needs, but many projects now benefit from the flexibility and speed of UE 5.6. The new features extend that advantage further.
- Virtual production. LED wall workflows gain from optimized real-time rendering and Lumen’s hardware ray tracing enhancements.
- Live events and broadcast. Quick Render and real-time tools enable fast turnaround for events requiring cinematic visuals on tight schedules.
- Large-scale games. Improved geometry streaming and optimized 60 FPS pipelines support seamless in-game cinematic experiences without offline render delays.
- Previsualization. Fast iteration on lighting, cameras, and animation is now practical with better Sequencer tools and performance boosts.
- Performance capture. Integrated mocap and facial capture workflows reduce the need for external tools, keeping production inside the engine.
- Indie and mobile projects. High-end visuals can now be achieved in real time, even on constrained platforms, thanks to FPS-optimized profiles and PCG enhancements.
Real-time UE 5.6 makes sense wherever speed, flexibility, and integration outweigh the absolute final frame photorealism of traditional offline workflows.
Unreal Engine 5.6 Cinematic Quality: Game-Changer Tools and Features
Unreal Engine 5.6 introduces tools that make achieving cinematic quality more efficient and scalable across teams. Whether for cutscenes, trailers, or full in-engine films, the latest version supports faster iteration with higher fidelity.
Many UE 5.6 cinematic features now allow real-time workflows that previously required extensive offline rendering. Enhanced Sequencer, MetaHuman, Lumen UE 5.6, and Nanite UE 5.6 pipelines help teams maintain consistent visual quality. The next sections explain the key features production leads should adopt.
UE 5.6 Movie Rendering Pipeline: Overview for Production Leads
The UE 5.6 movie rendering pipeline enables studio-grade output without the heavy cost of offline rendering. Key improvements in Movie Render Queue UE 5.6 help teams manage shots more efficiently.
- Quick Render. Instantly render high-quality stills and sequences using settings from Movie Render Graph.
- Cinematic Assembly Toolset. Simplifies shot management, allowing reusable templates and consistent naming across production.
- Sequencer HDR export. Improved HDR workflows ensure cinematic cutscenes output correctly for high-end displays.
- UE 5.6 Path Tracer cinematic support. Offers a reference standard for validating Lumen results or generating hero frames when required.
- Motion blur and TSR. Tuning UE 5.6 motion blur and TSR settings for cinema quality helps align real-time output with expected film standards.
- Post-processing for a cinematic look. Built-in UE 5.6 post-processing for cinematic look tools streamlines grading and lens effects within the engine, providing a seamless workflow.
Lumen UE 5.6 vs. Path Tracer for Cinematic Results
Choosing between Lumen UE 5.6 and UE 5.6 Path Tracer cinematic depends on production goals and time constraints. Here is where each option excels:
- Lumen UE 5.6. Ideal for real-time cinematic UE 5.6 workflows and fast iteration. Updated Lumen settings for cinematic now handle complex global illumination (GI) and reflections more effectively than before.
- Path Tracer. Best for offline hero frames or reference comparisons. Offers unbiased GI but requires much longer render times.
- Hybrid approach. Many teams use Lumen UE 5.6 for all but key promotional shots. Matching UE 5.6 Lumen vs. Path Tracer for cinematic results is easier, thanks to improved tone mapping and reflection handling.
- Shot-based decision-making. For dynamic shots or interactive scenes, stick with real-time cinematic UE 5.6. For static beauty shots, consider Path Tracer when the extra render time is acceptable.
Making the right choice scene by scene is the most efficient way to balance quality with delivery speed.
Nanite Assets for Cinematic Scenes and Workflow
Nanite UE 5.6 continues to enhance how teams manage detailed environments in cinematic rendering for Unreal Engine 5.6. The latest version makes using Nanite assets for cinematic scenes more practical than ever.
- Unlimited detail. High polycounts no longer impact scene performance. Large-scale environments stay crisp during camera moves.
- Optimized for 60 FPS. With new UE 5.6 high-quality visual profiles, Nanite-heavy scenes can maintain target framerates for real-time cinematic UE 5.6.
- UDIM textures UE5.6 cinematic pipeline. Full UDIM support ensures hero assets maintain texture fidelity at close range.
- Seamless streaming. The step-by-step UE 5.6 cinematic workflow now benefits from faster geometry streaming, eliminating LOD pops during critical shots.
- Better lighting stability. Nanite surfaces now work more predictably with Lumen UE 5.6, resulting in cleaner global illumination (GI) and reflections in complex scenes.
Teams focused on creating film-style cutscenes in UE 5.6 should rely heavily on Nanite for any environment or prop where surface detail matters.
Get in touch with us for any Unreal Engine game project.
Cinematic Lighting Mastery in UE 5.6 — Practical Techniques That Work
Mastering cinematic lighting in UE 5.6 is key to delivering visuals that match professional film standards. The engine now offers advanced controls that simplify this process across real-time and rendered outputs.
By focusing on practical lighting setups and tuning Lumen settings for cinematic rendering in Unreal 5.6, teams can produce consistent results.
Best Tips for Cinematic Lighting in UE 5.6
Production teams use specific techniques to improve cinematic lighting results in UE 5.6. Applying these steps helps maintain control over scene mood and visual consistency:
- Define light sources. Start with a clear primary light source and avoid using too many active lights to keep lighting grounded.
- Use area lights. Rectangular and disc lights often produce more realistic soft shadows and highlights than point or spotlights.
- Control exposure. Lock exposure in the camera settings to avoid automatic adjustments that can ruin scene consistency.
- Add fill and rim lighting. Place low-intensity lights to separate subjects from backgrounds without flattening the image.
- Tune shadows. Increase light source size to soften shadows and avoid hard edges unless stylistically required.
- Match color temperature. Maintain a consistent white balance between lights and post-process settings for a cohesive cinematic look.
Following these best tips for cinematic lighting in UE 5.6 ensures strong results across both gameplay and cinematic sequences.
Lumen Settings for Cinematic Rendering in Unreal 5.6
Lumen in UE 5.6 offers flexible tools for high-end cinematic rendering. However, default settings often require tuning for best results. Use the following adjustments to improve cinematic output:
- Global illumination quality. Increase final gather quality and indirect lighting smoothness for cleaner bounces.
- Reflection settings. Raise reflection quality to reduce noise and artifacts on shiny surfaces.
- Lumen scene detail. Increase Lumen scene detail to improve the fidelity of indirect shadows and small features.
- Ray distance. Adjust Lumen ray distance to ensure deeper GI coverage in large or open scenes.
- Lighting scenarios. Set up separate Lumen profiles for gameplay and cinematics to avoid compromising performance during interactive segments.
- Test shots. Always compare Lumen output against Path Tracer renders to validate light accuracy and identify subtle issues.
Careful tuning of Lumen settings for cinematic rendering in Unreal 5.6 is one of the most effective ways to achieve film-grade visual quality in-engine.
How To Fix Noise in UE 5.6 Movie Render Queue
Noise often appears in dark areas or high-reflection surfaces when using the UE 5.6 Movie Render Queue. Reducing it requires both settings adjustments and scene optimizations:
- Increase sample count. Raise the anti-aliasing and reflection sample counts in Movie Render Graph settings.
- Enable denoising. Activate built-in denoising for reflections and global illumination where supported.
- Reduce light intensity gaps. Avoid extreme brightness differences between lights and dark areas to minimize noise risk.
- Optimize material roughness. Extremely low roughness on materials can exaggerate noise; fine-tune roughness for balanced reflections.
- Adjust Lumen settings. Increase Lumen global illumination and reflection quality to reduce visible noise further.
- Render in higher resolution. Rendering at a higher resolution and downsampling helps hide residual noise in the final output.
Using these steps when tuning your pipeline ensures you can fix noise in the UE 5.6 Movie Render Queue and deliver clean, professional results.
Cinematic Camera Setup in Unreal Engine 5.6: How Pros Achieve Stunning Shots
Producing film-style shots for games requires precision and efficiency. Unreal Engine 5.6 now offers robust tools that let game developers create high-end cutscenes and marketing visuals directly in the engine.
Whether you need to create in-game cinematics or promotional trailers, the latest features in Sequencer and virtual camera systems enable this work to be done faster and more flexibly. If your team needs to scale production or if you want to hire Unreal Engine developers who can deliver cinematic results, these tools are essential.
Step-By-Step UE 5.6 Cinematic Workflow for Camera Animation
Game developers often need to animate cameras efficiently while maintaining full control. The following step-by-step UE 5.6 cinematic workflow supports professional camera animation:
- Define camera types. Choose Cine Camera Actor for all cinematic shots to access full camera controls and filmback settings.
- Lock exposure and settings. Set fixed focus distance, aperture, and ISO for consistency across all sequences.
- Animate camera movement. Use keyframes in Sequencer to animate position, rotation, and focal length as needed.
- Add camera shake. Apply subtle camera shake through Camera Shake Modifiers or manual keyframing to add realism.
- Test framing. Review each shot in intended output resolution to confirm proper composition and safe areas.
- Export for final rendering. Use Movie Render Queue with optimized settings for camera motion and motion blur handling.
Following this step-by-step UE 5.6 cinematic workflow helps game studios produce polished camera work in cutscenes and trailers.
UE 5.6 Sequencer Tips for Professional Cutscenes
Sequencer remains the core tool for building cutscenes in games. Applying these UE 5.6 Sequencer tips for professional cutscenes ensures a more efficient and flexible process:
- Use nested sequences. Break complex scenes into smaller, manageable sequences to simplify editing.
- Label tracks clearly. Name camera, light, and animation tracks descriptively to avoid confusion in large timelines.
- Sync to audio. Leverage Sequencer’s audio scrubbing and relative scaling to align animation with voice and sound effects.
- Add manual holds. Insert small pauses in character animation or camera motion to emphasize emotional beats.
- Automate camera cuts. Use camera cut tracks instead of manually toggling camera visibility for cleaner transitions.
- Use bookmarks. Set bookmarks for key points in the timeline to speed up iteration and review.
Applying these UE 5.6 Sequencer tips for professional cutscenes improves both workflow speed and narrative quality in-game projects.
UE 5.6 Virtual Camera Tutorial for Real-Time Production
Virtual camera systems enable game developers to produce more dynamic shots and enhance creative flexibility during production. Follow this UE 5.6 virtual camera tutorial for real-time production to get started:
- Set up a virtual camera rig. Use the Virtual Camera Plugin and configure the rig with a tablet or motion device.
- Calibrate camera movement. Map physical device movement to camera actor in-engine, adjusting smoothing parameters as needed.
- Record takes. Use Take Recorder to capture multiple camera passes during live session playback.
- Combine with Sequencer. Import the recorded camera footage into Sequencer and fine-tune the keyframes for final polish.
- Optimize real-time performance. Lower Lumen quality temporarily during live virtual camera sessions to maintain responsiveness.
- Final review. Always test virtual camera shots at full quality in Movie Render Queue to catch artifacts or jitter.
Following this, the UE 5.6 virtual camera tutorial for real-time production helps game studios produce professional shots even in fast-paced production environments.
Achieving Cinematic Quality in Unreal Engine 5.6 Through Materials and Post-Processing
High-quality materials and precise post-processing define the visual polish of game cinematics. Unreal Engine 5.6 gives game developers powerful tools to control both. When building marketing assets, cutscenes, or trailers, even for genres like an Endless runner game in Unreal Engine, teams can achieve consistent cinematic quality by mastering UDIM textures, post-processing, and motion handling. The following sections outline practical methods used in real production pipelines.
UDIM Textures UE 5.6 Cinematic Pipeline Setup
UDIM textures allow detailed surface mapping without quality loss, which is critical for hero assets in cinematics. Follow this UDIM textures UE 5.6 cinematic pipeline setup for the best results:
- Enable UDIM support. In project settings, enable virtual texturing to support UDIM-based workflows.
- Import UDIM assets. Import texture sets correctly mapped to UDIM tile coordinates to ensure seamless coverage.
- Configure material nodes. Use Virtual Texture Sampler nodes in your material graphs to efficiently read UDIM tiles.
- Optimize streaming. Adjust texture streaming settings to prioritize UDIM tiles in the camera view, which improves memory usage.
- Validate asset resolution. Check texture sharpness at intended camera distances; adjust texture size or mip bias as needed.
- Test in Movie Render Queue. Always validate UDIM-based assets in the Movie Render Queue to ensure clean final output.
Using this UDIM textures UE 5.6 cinematic pipeline setup ensures your game cinematics maintain top-tier material fidelity without sacrificing performance.
UE 5.6 Post-Processing for Cinematic Look
Post-processing in UE 5.6 directly shapes the final cinematic look of your game visuals. Apply the following techniques to optimize results:
- Set up post-process volume. Use an unbound post-process volume to maintain consistent effects across all cameras.
- Color grading. Apply LUTs or manual grading to match the project’s desired cinematic tone and contrast.
- Bloom control. Tune bloom intensity carefully; too much bloom can ruin clarity in action-heavy game shots.
- Vignette and chromatic aberration. Apply these subtly to add depth and realism without distracting players or viewers.
- Film grain. Introduce light film grain to unify the image but keep it balanced to avoid digital noise conflicts.
- Sharpening. Use sharpening selectively on scenes where clarity is critical, such as UI or gameplay overlays.
Mastering UE 5.6 post-processing for a cinematic look helps your team deliver polished visuals aligned with industry expectations.
UE 5.6 Motion Blur and TSR Settings for Cinema-Quality Output
Correct motion blur and TSR settings are essential to achieving cinema-quality output in UE 5.6 cinematics. Follow these best practices:
- Use cinematic motion blur. Enable cinematic motion blur in the camera settings, and adjust the shutter angle for realistic blur strength.
- Tune per-camera settings. Adjust motion blur independently per camera if using different shot types (static vs action).
- Optimize TSR quality. Set TSR to high or very high quality in Movie Render Queue for maximum clarity in final frames.
- Limit post blur. Avoid stacking engine motion blur with post-process motion blur to prevent visual artifacts.
- Monitor edge artifacts. Test fast camera pans and quick cuts to identify and resolve any TSR-related edge blurring issues.
- Validate in final renders. Always preview motion-heavy shots in full Movie Render Queue passes before locking cutscene edits.
Carefully tuning UE 5.6 motion blur and TSR settings for cinema-quality output ensures clean, professional motion results suitable for any game cinematic.
Optimizing Movie Render Queue UE 5.6 for Faster and Better Results
Game developers often face tight deadlines for cinematic content. Optimizing Movie Render Queue UE 5.6 helps deliver professional results faster without compromising quality. Compared to other engines, a key point in the Unity vs. Unreal decision for many studios is that Unreal Engine 5.6 offers far more advanced and customizable rendering controls. The following sections provide actionable steps for improving both render quality and pipeline efficiency in real-world production.
Optimizing Movie Render Queue Settings UE 5.6 for Best ROI
Teams working on game cinematics need to balance render quality with production efficiency. Optimizing Movie Render Queue settings UE 5.6 for best ROI starts with using output presets. These presets ensure that settings remain consistent across projects, avoiding quality drift or setup errors. Many studios target 1440p resolution for online delivery, which offers a strong quality-to-speed balance without the excessive time cost of full 4K rendering.
Focusing sample counts on hero shots also improves efficiency. Anti-aliasing and reflection sample values can be raised selectively for key sequences, while background shots can use default values to save time. Temporal sampling is another important factor, enabling it to help maintain stable motion blur and depth of field without introducing flicker.
Studios should also render uncompressed master files to preserve maximum quality and handle final compression externally. Profiling render times across typical sequences allows teams to identify settings that consume disproportionate time, letting them fine-tune their workflows for faster, more cost-effective production.
Tips for Reducing Render Times in UE 5.6 Cinematics
Render time often becomes a bottleneck in cinematic production. Apply these tips for reducing render times in UE 5.6 cinematics:
- Reduce ray depth. Lower Lumen reflection and GI ray depth for shots where extreme accuracy is not needed.
- Use proxy assets. Replace high-poly background assets with proxy meshes for scenes with heavy camera focus on the foreground.
- Optimize post effects. Disable unnecessary effects like excessive film grain or vignettes during test renders.
- Render in passes. Separate elements such as UI, FX, and environment into passes when possible for more efficient iteration.
- Leverage GPU scaling. Utilize high-performance GPUs in render nodes, where available, to significantly reduce render time.
- Batch render during downtime. Schedule Movie Render Queue jobs overnight or during low network usage windows.
Applying these tips for reducing render times in UE 5.6 cinematics helps game studios maintain tight delivery schedules without sacrificing output quality.
UE 5.6 Sequencer HDR Export Workflow
Producing HDR content in Unreal Engine 5.6 requires careful attention to the entire export pipeline. The UE 5.6 Sequencer HDR export workflow begins with selecting an appropriate project color space, such as Rec. 2020 or ACEScg. Setting this correctly from the start ensures that HDR color data is preserved throughout the production process.
In the Movie Render Queue, use 16-bit or EXR formats to retain the full range of HDR information. Tone mapper settings also need to be adjusted carefully. Avoiding highlight clipping and preserving shadow detail are key priorities to maintain the integrity of HDR visuals.
For accurate review, HDR output must be viewed on a properly calibrated HDR display. Testing across the final delivery platforms, whether YouTube HDR, streaming services, or in-game, helps confirm that the exported HDR content will perform as expected. Finally, uncompressed HDR master files should be archived to allow flexibility for future delivery requirements.
Real-World Applications in Creating Film-Style Cutscenes in Unreal Engine 5.6
Game studios today use film-style cutscenes to boost player engagement, deliver stronger narratives, and enhance marketing assets. Unreal Engine 5.6 gives developers a practical way to build these scenes with tools that match professional film standards.
The workflows used to create these cutscenes also apply well across multiple genres, including projects where studios explore how to make VR games in Unreal Engine.
Creating Film-Style Cutscenes in UE 5.6 With Proven Workflows
Building film-style cutscenes in Unreal Engine 5.6 starts with a structured process that aligns with the game’s narrative and visual goals. Teams typically begin by blocking out key story moments in Sequencer, using temporary animations and cameras to define timing. This allows directors and designers to review pacing and staging before investing in full animation.
Next, the lighting and materials team prepares a version of the scene optimized for cinematic rendering. They focus on tuning Lumen settings and refining material properties to maintain consistency under controlled lighting conditions. Camera animation comes next, using either Sequencer or virtual camera systems to create natural movement and frame key shots.
Audio and dialogue tracks are synced carefully within Sequencer to ensure tight alignment between visuals and sound. Final passes focus on refining post-processing, motion blur, and any character performance tweaks. This proven workflow allows game teams to deliver film-style cutscenes that meet the expectations of modern players.
How Does Lumen Improve Cinematic Quality in UE 5.6?
Lumen dramatically improves cinematic quality in UE 5.6 by providing real-time global illumination and reflections that match the visual fidelity of offline renderers in many cases, which lets game developers iterate faster on lighting without the traditional bake times required by older GI systems.
One of the biggest gains comes from Lumen’s ability to maintain consistent lighting across dynamic camera movement. Cinematic shots with moving cameras or changing lighting scenarios retain realistic GI and reflection behavior without artifacts or lag.
Lumen also handles detailed environments well, preserving bounce light and subtle interactions even when working with high-density Nanite geometry. For developers working on in-game cutscenes and trailers, this means fewer compromises between runtime performance and visual quality. The ability to test and adjust lighting interactively, with no need to rebake, streamlines production and supports higher-quality final results.
Unreal MetaSounds for Cinematic Production
Unreal MetaSounds gives developers new control over sound design in cinematic production. Unlike traditional audio workflows, MetaSounds allows fully procedural sound creation and playback driven by in-game or Sequencer events.
In cinematic workflows, MetaSounds lets sound designers build adaptive soundscapes that respond to scene dynamics. For example, a MetaSound graph can adjust ambient sound levels based on camera proximity or character motion.
MetaSounds also integrates tightly with Sequencer, allowing sound events to be triggered precisely alongside animation and camera cuts, ensuring frame-accurate audio synchronization, which is critical for delivering polished cinematic experiences. By using Unreal MetaSounds for cinematic production, game teams can achieve more responsive, immersive sound design while maintaining full creative control inside Unreal Engine 5.6.
Game-Ace Can Bring Your Cinematic Vision to Life with UE 5.6
If your studio is planning a project that demands high-quality cutscenes or cinematic marketing assets, Game-Ace is ready to help. As a custom game development company with deep experience in Unreal Engine, we deliver real-time cinematics that match today’s film and game standards.
Our team leverages proven workflows in Unreal Engine 5.6 to produce cinematic sequences efficiently and at scale. From previsualization to final rendering, we handle every step of the process to ensure consistent results. Whether you need film-style cutscenes integrated into your gameplay or standalone trailers for marketing campaigns, we can tailor the solution to meet your specific needs.
Using advanced features like Lumen, Nanite, Sequencer, and MetaSounds, we help game studios and publishers achieve visuals that stand out in a crowded market. You can rely on our expertise to optimize pipelines, reduce render times, and deliver content that meets the expectations of modern players.
Contact us to learn how Game-Ace can support your cinematic production goals with Unreal Engine 5.6.
 How to Develop an Endless Runner Game in Unreal Engine: A Step-by-Step Guide
  The Best Game Engines: Research from Game-Ace Specialists
  Unity vs Unreal: Two Main Game Engines Compared by Game-Ace
  Unreal Engine 4 vs 5: Evolution in Game Development
  The Full Guide of Unreal Engine Game Development